Showing posts with label Cricut. Show all posts

Thursday, April 12, 2012

Celebrating A Springy Birthday With Blog Candy

Popping in this evening with a birthday card using some fresh springtime colors.  This trio of green, honey yellow, and pink are combined with a tag embellishment for the Just-A-Scrappin challenge #4.
Card Base - Art Philosophy
5.75" Tall
Rosette - Ribbons & Rosettes
1.4" Tall (8 segments total)
Tag for Sentiment - Art Philosophy
Beige  - 1.55" Tall
Green - 1.35" Tall

The decorative border at the bottom was cut with a die from the STUNNING new Spellbinders Persian Accents.  I then added some "life" with Viva Pearl Pens.

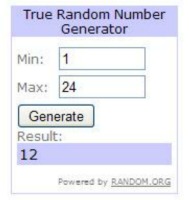
To be entered into the drawing for the Cricut cartridge, please become a follower of my blog and leave a comment on this post.  I will use random.org to choose a winner on Sunday, April 15th.

Good luck everyone!

Wednesday, March 28, 2012

Egg-celent Easter Treats

Today I'm posting a project I did for the kiddos in my family.  I picked up the clear plastic tubes on sale for $.75 each at a local scrapbook store and knew they'd be perfect for filling with Easter goodies.  It's my opinion that this time of year brings out the yummiest candy imagineable!  And I just can't help myself when it comes to passing these treats out to loved ones.


Cricut cuts were all done at 3-4" tall.


Lamb-Create A Critter
Bird w/Bunny Ears-3 Birds on Parade
Chick-Simply Charmed

Eggs-Easter Seasonal 2010

I should also mention that this project was done for Challenge #3 over at Just-A-Scrappin.  Head on over to check out the other DT projects for some egg-stra special inspiration.

Feel free to link up your Easter project to join in the fun!!!!!

Thursday, March 15, 2012

Luck of the Irish

We've been having the most beautiful weather in Minnesota and I'm chalking it up to the luck of the Irish!  In celebration of St. Patrick's day on Saturday I've created a card to give my hubby.
Photobucket

Leprechaun cut from Simply Charmed at 3" tall
Photobucket

Triangles for banner cut from CM Art Philosophy at 1.25" wide

This card is my design for challenge #2 over at Just-A-Scrappin.  The challenge requirement was to use the color green and a banner.

Thursday, March 1, 2012

Just-A-Scrappin Challenge #1 - Card Cutout

Our first challenge over at Just-A-Scrappin is to create a card using a cutout or frame.  My take on this was to use an image as my cardbase instead of the standard rectangle.  This comes at a perfect time to make a congrats card for a girlfriend of mine that found out recently she's expecting a boy!

The bottle is a cut from Gypsy Wanderings and is 4" wide x 7" tall.  I used my Gypsy to weld two of the bottle shapes together.  I also used the hide contour feature to only cut certain parts of the bottle.  A lot of hand trimming took place in order to get the nipple of the bottle a different color and to place the colorful striped paper behind the cutout portion on the front.


And now that I've hopefully spurred your creativity, hop on over to Just-A-Scrappin to add your creation to this challenge!

Friday, February 10, 2012

Pretty Princess

I consider myself to be lucky because I began scrapbooking very early in life.  Because of this I've been able to stay on top of pages for current events.  Now before you get frustrated because you're still working on Easter of 1994, hear me out!  Sure, it's nice to feel caught up and not worry about remembering details for twenty years worth of life.  But the more I think about it, I believe I'd prefer to be behind with my scrapbooking.  I go to several weekend scrapbook retreats (thanks to my oh-so-understanding hubby) and I see so many women reminiscing over their spirited and loving toddlers who have grown to be "spirited" teenagers in what seems like a blink of an eye.  I love the idea of reliving the past and being able to spend an entire weekend remembering events that meant so much to me.  Granted I have a fairly poor memory and will have to begin making notes so that I can remember all of those little details, but that won't be too hard to do.

With that being said, I created a layout today for pictures of me when I was just five years old.  It will be fun to talk to my mom and find out more about myself when I was little.  I'm positive it will be just as much fun for her as it will for me.

Sizzix Flourish #2 Bigz Die

Castle is from P.28 of Paper Doll Dress Up and is cut at 6" high.


I added a hidden journaling tag that slides behind this decorative square.


Tuesday, January 31, 2012

Under The Weather

Today my goal was to create a card for the weekly challenge over at the Cricut Circle blog. But when reading the challenge back, I missed basically every part of what the requirements were. Ha! I guess that's just the way it goes sometimes. I had fun creating the card none-the-less.
The main shape for the Get Well stamp was
cut from Ashlyn's Alphabet.
White Solid Background - 4"

The solid green and pattern green frames were cut by
layering two of the same shape.

Solid Green - 2.25" inside of a 3.4"
Pattern Green - 2.5" inside of a 3.25"

The stamp is by PSX and was colored with the following Copics:
Y28
YG17, YG25
Y15, Y11


Green Flourishes were also cut from Ashlyn's Alphabet
at 3" tall and 2.5" tall.

Monday, October 31, 2011

Wishing You More Treats Than Tricks!!!!!


Time to announce the winner of the candy from the blog hop last week.  I've used random.org to choose the winner.

Drum roll please...............................and the winner is..............
Congrats Dana!  I've emailed you for your address.

Now on to a Halloween Treat Bag.

These treat bags were made to send to some of my son's cousins.  The bat was cut from Hello Kitty Greetings.  I used colored pencils to shade his ears and belly.  Since these are going to small children, I didn't even attempt to shade well.  I then used Viva Decor Pearl Pens to make the eyes and nose.
On a side note:  I love these pens over Stickles b/c they come in solid colors, dry WAAAAAY faster, and end up just as three-dimensional as they look when wet.
Finally I used a white Uniball pen to make his fangs.

The trim at the top is just a strip of black paper that has been punched with Martha Stewart Iron Gate Punch Around The Page.  I layered it overtop white paper to make the detail stand out a bit.  Then I used some super cute batty paper.

Wednesday, October 26, 2011

A "Fairy" Beautiful Triple Layered Easel Card

I don't know that I've ever actually stated that one of my cards is my "favorite", but I will go out on a limb and claim that this one is!!!!  It's my first attempt at a triple layered easel card (or any type of easel card for that matter), and it turned out fantastic!
We'll work back to front for this card.

For the back layer I used some Grand Nestabilities Scallop Circles.  I didn't want to have too much empty space at the top of the card, so I made sure to use the larger circles and trim the bottoms to fit.  It's not necessarily pretty this way, but it isn't seen when the card is standing up.  The leaves and branch are cut using my Cricut and then shading was done with Copic markers.  I also paper pieced three of the flowers and popped them up with dimensional foam.
The middle layer has a lot more detail to it.  The strawberry was cut using my Cricut, blinged up with Stickles, and layered on top of a pinwheel I made out of fabric.  Then to the right is my sweet little sitting fairy.  I'll have to do some googling to find who makes the stamp because I can't for the life of me remember.  Maybe someday I'll be one of those über organized individuals that stores everything by vendor, but for right now I'm lucky if I can even remember how to get to my scrapping room.  Finally I added a little more pizazz with some beads I found in the floral department.  A little TIP:  I bought these beads in white and use my Copics to color them to match the project I'm working on.

Finally we get to the smallest bottom layer.  The ribbon was sewn onto the base to act as a stopper/prop.  The cute label on this layer was also cut with my Cricut and then stamped with a Stampin Up verse.
I still find it very difficult to mail out many of the cards I make.  As I'm branching out into different embellisments, the cards just keep getting bigger and bulkier.  Luckily this type of card folds down quite nicely in order to fit in an envelope.

Thursday, September 29, 2011

Be It Ever So Humble, There's No Place Like Home

What an amazing feeling to have a place to call home.

Home can be different things to different people.  Regardless of the actual "address", home means feeling safe, secure, and accepted as you are.  A scrapping friend of mine just closed on her first house with her fiance and is finally feeling those comforts.  In the midst of planning a wedding, finding and buying a house seemed quite luminous to her and I'm certain she's breathing a huge sigh of relief.  But even more important than that----she has a place to start building the family and memories she's wanted her whole life.

I wanted to send her a card of congratulations to make her reflect even more on her cozy new home.  I chose to create my project with the foresight of the Cricut Circle challenge specifying a window theme.

Cricut Cartridges Used:
Cindy Loo:  Bird
French Manor:  Window
Jubilee:  Bush

Thursday, August 11, 2011

Sitting Here Thinking Of You

SIMPLE----that tends to be my style when it comes to cards.  But recently I've ventured deeper into the world of greeting cards and am loving it.  So many bloggers out there are beyond talented and their creations can really be looked at as art more-so than just a simple greeting card.  The card in my post today was "finished" according to my typical standards, but I decided to add another element to it.  Perhaps if I add one little thing at a time it won't seem so overwhelming.

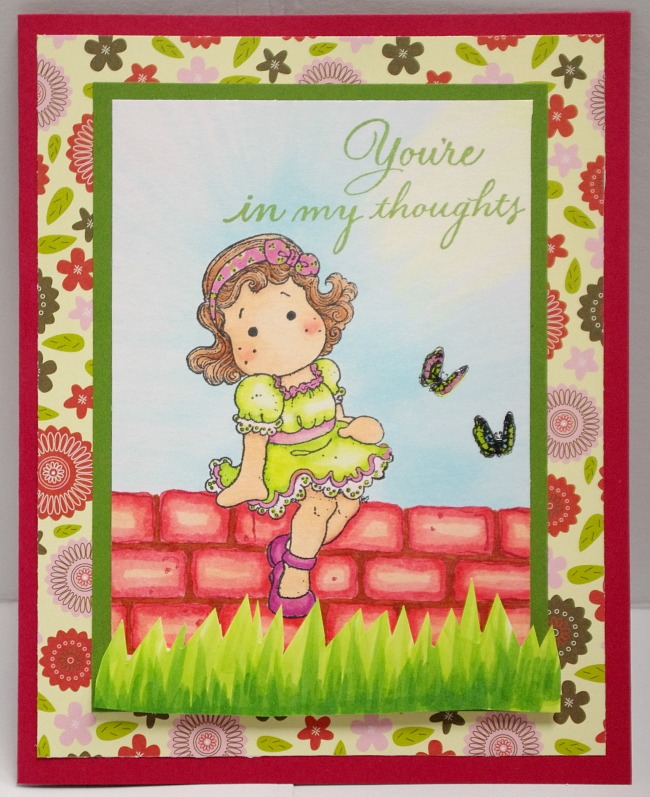
This pic shows my "finished" card before the flower vine was added.
Now here is the real end product.  I think that one extra piece added quite a lot of pizzaz to this card.
The vine portion was cut with my Cricut from the Bloom Lite cartridge.  I cut two of the leaf portions below and adhered them together.
The flowers were stamped on decorative paper from a Stamps happen image (Buttercup Fairy) then popped out on the vine.

I've used Circus Tilda and placed her on a brick wall that I created myself using my Copic markers.

This card will be used for the following challenges:
Stamping Scrapping Challenge Central - Anything summer - Shop HERE
Magnolia Highlites Challenge - Only paper - Shop HERE
Bling It On - A, B, C Challenge (All Paper, Butterflies, Cricut Cuts)
Copic Creations - Challenge No. 55 ~ Landscape Design!

Thursday, July 28, 2011

Cowboy In Training

I may be a little bias, but I have the most adorable 2 year old boy anyone could ever want.  While I love him to pieces, I find it difficult to create scrapbook layouts that aren't frilly and girly.  I'll put this layout into the win column though because it turned out super cute.  It was actually the first time I created a page without having any pictures first.  But I have since come across some cute pics of Logan wearing his dad's cowboy hat and boots.  They'll be perfect for this LO.

Most of the cuts from this LO are from Old West.  But the tumbleweed at the bottom is actually a bird nest cut from Straight From The Nest.  ;)